Comparing Vendor Quotes
Once you've imported at least one vendor's quote, the Compare sub-tab of the Quotes tab (the RFQ workspace) puts every vendor's prices side by side. From there you lock the price you're going with on each line and write those locked prices back into your bid. This article picks up at that point — see Using the RFQ feature for the full request-and-import workflow.
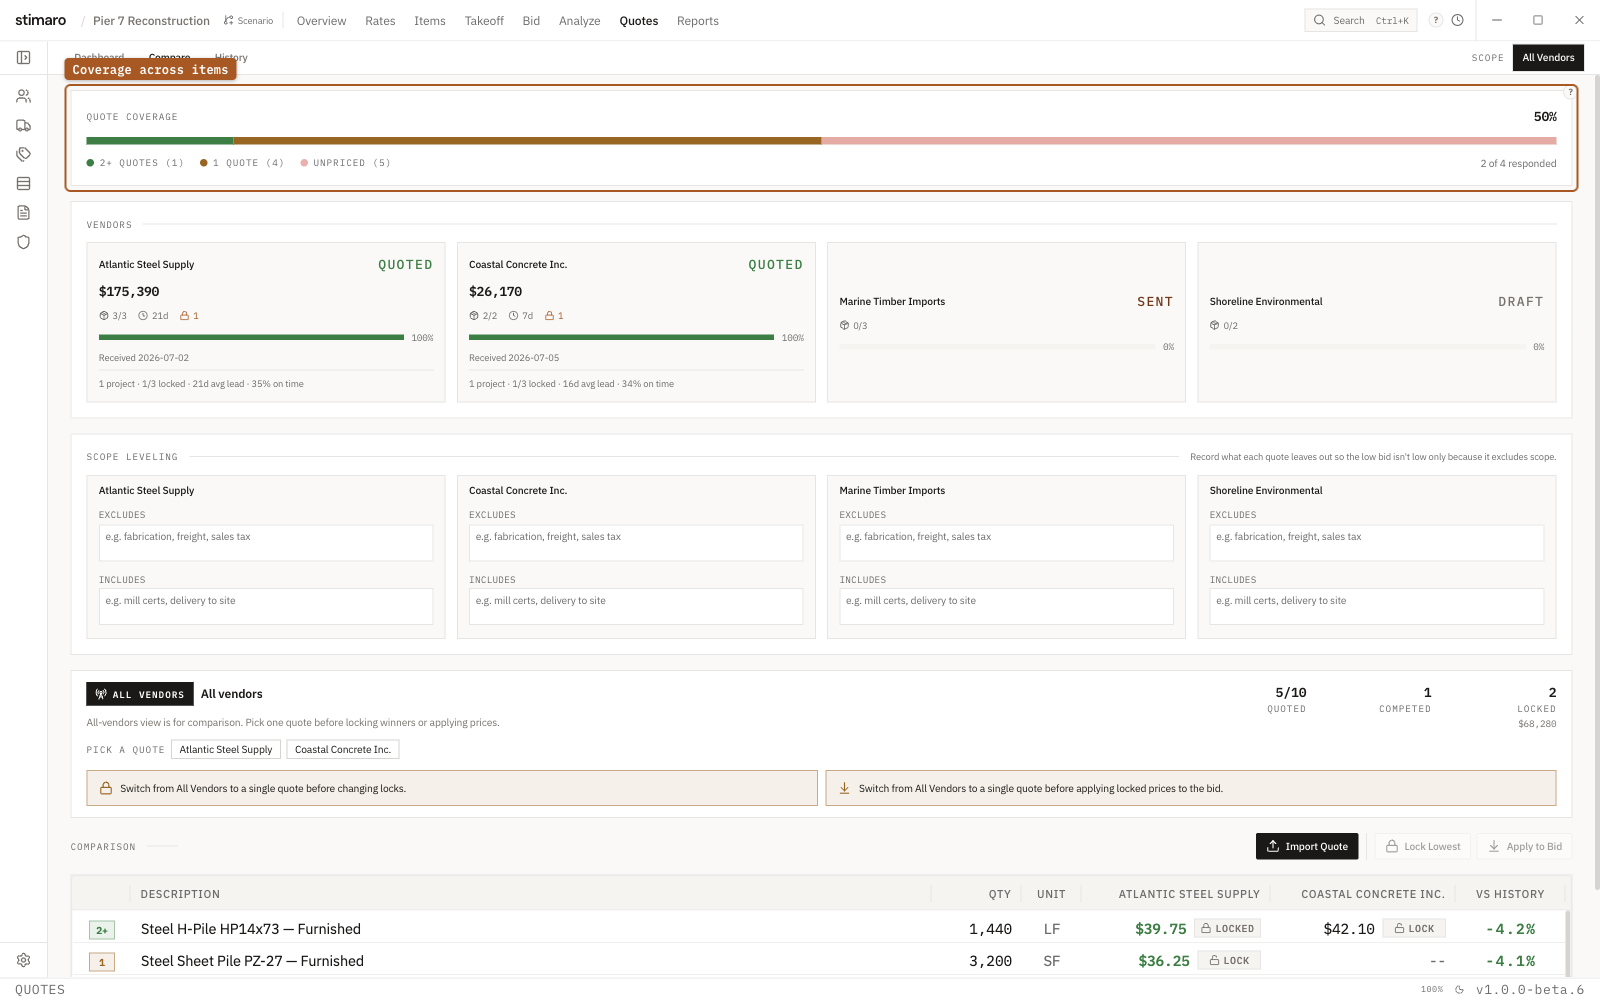
Compare tab. The Quote Coverage bar shows how well the bid is priced, and the grid puts every vendor's price side by side with the lowest highlighted.Getting to the comparison
The Quotes tab has three sub-tabs: Dashboard, Compare, and History. Open Compare to see your vendors' prices lined up against each other for the same scope. Each row is one line you asked to be priced; each vendor gets its own column.
The Quote Coverage bar
A Quote Coverage bar sits above the grid and tells you how well-covered the scope is before you start comparing. It shows a coverage percentage, a stacked bar, and a legend that breaks the lines into three states:
- Green — 2+ quotes. Lines with two or more vendor prices, where you have a real comparison to make.
- Amber — 1 quote. Lines with a single price, so you have a number but nothing to check it against.
- Red — Unpriced. Lines no vendor has quoted yet.
The bar also shows how many vendors have come back, as "X of Y responded." Use it as your readiness check: a bar that's mostly red or amber means you're deciding on thin information, and it's worth chasing more quotes before you lock anything in.
Reading the comparison grid
The grid puts the line identity on the left, then one price column per vendor on the right:
| Column | What it shows |
|---|---|
| Status chip | How many vendors have priced the line — 2+ (green), 1 (amber), or 0 (red). This is the per-line version of the coverage legend. |
Description | The line being priced. |
Qty | The quantity you asked to be quoted. |
Unit | The unit of measure the price is per. |
| One column per vendor | Headed by the vendor's name. Each price cell shows that vendor's unit price for the line, with a Lock / Locked toggle to select it. The lowest price on the line is shown in green and bold. |
vs History | A badge showing the percent change of the lowest price on the line against what you've paid before, so you can see whether the market has moved up or down since your last job. |
The green, bold lowest price is a starting point, not an automatic decision. Lowest isn't always the one you want — lead time, a vendor you trust, or a price that looks too good to hold can all point you elsewhere. The grid surfaces the number; the call is yours.
Locking a price
Locking records the price you've settled on for a line. To lock one price, click Lock on that vendor's cell; the toggle flips to Locked. To lock the lowest price across the board, click Lock Lowest — it asks you to confirm first, then locks the cheapest quote on each line that has at least one quote. Lines no vendor priced are left untouched.
All Vendors view to a specific quote first — you can't lock prices while every vendor is combined into one view.Applying locked prices to your bid
Once you've locked the prices you want, Apply to Bid pushes them into the estimate. It writes each locked price onto the matching Material, Subcontract, and Other detail rows in your items — but it leaves any row you've manually overridden alone, so a one-off price you set by hand isn't quietly replaced by a quote.
When it applies, it reports the effect on your bottom line as "Bid total $before → $after," so you can see exactly how much the locked prices moved your bid.
Apply to Bid only touches Material, Subcontract, and Other rows, and it skips manually overridden rows. Labor and equipment costs, and any rate you've set by hand, are not changed by applying quotes.